
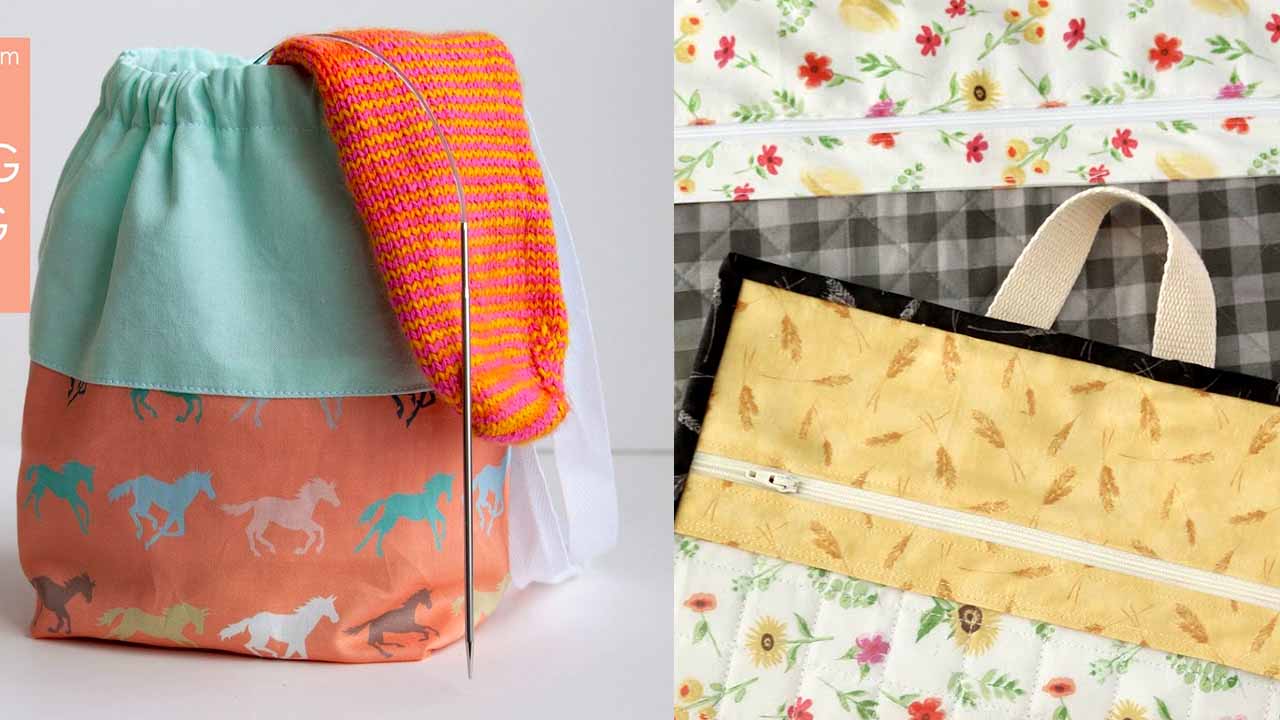
How to Make Project Bags? To Make Project Bags, start by choosing a fabric and cutting out two rectangles. Then, sew the sides and bottom together, leaving the top open.
Fold over the top edge and sew a loop on each side for the drawstring. Now you have a project bag! Project bags are essential for keeping your knitting, sewing, or other crafting projects organized and portable. Whether you’re a beginner or a seasoned crafter, having a designated bag for your project can help ensure that all your supplies are easily accessible and in one place.
Making your own project bag can be a fun and creative way to customize it to your liking while also being cost-effective. With just a few simple steps, you can create a practical and stylish bag that will keep your projects safe and organized. We will guide you through the process of making project bags, from choosing the fabric to adding a drawstring closure. So, let’s get started!
Unleashing Your Creativity With Fabric Choices
When selecting the right material for your project bags, there are a few key considerations to keep in mind. Cotton, canvas, and nylon are popular choices, each with their own pros and cons.
| Material | Pros | Cons |
|---|---|---|
| Cotton | Natural and breathable Wide variety of prints and colors Easy to wash and care for | May not be as durable as canvas or nylon Can shrink if not prewashed |
| Canvas | Sturdy and durable Can handle heavier loads Great for embroidery or embellishment | May be heavier than other fabrics Less variety in prints and patterns |
| Nylon | Lightweight and water-resistant Durable and long-lasting Easy to clean | Less breathable than cotton or canvas Limited options for prints and colors |
Another consideration is whether to choose patterned or solid fabric for your project bags. Patterned fabrics can add a pop of personality and style to your bags, while solid fabrics offer versatility and a more classic look. Ultimately, the decision between patterned versus solid fabric depends on your personal preferences and the overall aesthetic you want to achieve with your project bags.

Designing Your Project Bag
Designing your project bag starts with determining the size and shape that will best suit your needs. Consider the types of projects you typically work on and how much space they require. A larger bag may be necessary for bigger projects or holding multiple projects at once. Think about the shape that will be most practical for you, whether it’s square, rectangle, or even a custom shape.
Adding unique features and compartments to your project bag can improve its functionality. Consider including pockets, hooks, or loops to keep your tools and supplies organized. Think about how you like to work and what features would enhance your crafting experience.
Selecting the closure type for your project bag is an important decision. Zippers provide a secure and durable closure option, while snaps offer ease of access. Ties can be a more customizable closure option, allowing you to adjust the bag’s opening size as needed.
Preparing Your Sewing Station
When making project bags, it is important to have a well-prepared sewing station. This includes gathering the necessary tools and equipment. Some essential tools for making project bags include fabric scissors, measuring tape, and a rotary cutter. Accurate cutting and measuring of fabric is crucial for ensuring the proper size and shape of the bag.
It is also important to set up your sewing machine properly before starting the project. Make sure the machine is threaded correctly and the tension is adjusted appropriately. Having a clean and organized sewing station will not only make the process easier, but it will also help you stay focused and efficient. By following these steps, you will be well on your way to creating beautiful and functional project bags.

Project Bags Step By-Step Sewing Guide
Start by cutting out two rectangular pieces of fabric for the body of the project bag. Place them right sides together and sew around the three sides, leaving the top open. Turn the bag right side out and press it flat.
Decide on the number and size of pockets you want to add to the bag. Cut out the pocket fabric and attach them to the inside of the bag using pins. Sew around the edges of the pocket, making sure to leave an opening for inserting items.
Choose a closure option for the bag, such as a zipper, button, or snap. Install the closure according to its instructions. Add any final touches, such as embellishments or decorative stitching, to personalize your project bag.
Adding Personalized Elements
Adding embroidery and applique techniques to your project bags can create a personalized and unique look. Embroidery allows you to add intricate designs and patterns to your bags, while applique lets you add fabric shapes or designs to them. These techniques provide a great opportunity to showcase your creativity and style.
Another way to add a personal touch to your project bags is by using decorative trims and hardware. You can embellish your bags with ribbons, lace, or pom poms, and attach decorative buckles or closures for an added touch of elegance. These small details can make your project bags stand out and reflect your personal style.
DIY patches and fabric paint for a unique look:
If you want to achieve a truly unique look for your project bags, you can create your own patches or use fabric paint. With DIY patches, you can sew or iron your own designs onto the bags. Meanwhile, fabric paint allows you to add hand-painted details, patterns, or even quotes to your bags. These techniques give you the freedom to express your creativity and make your project bags one-of-a-kind.

Project Bags Maintenance And Care Tips
| Best practices for keeping bags in top shape |
|---|
When it comes to maintaining and caring for your project bags, following these tips can help ensure their longevity:
|
Frequently Asked Questions For How To Make Project Bags
How Do You Make A Simple Bag?
To make a simple bag, choose your desired fabric, cut out two identical rectangular pieces, sew the sides and bottom together, attach handles to the top, and you’re done! Customize with pockets or embellishments if desired. It’s an easy and enjoyable project for beginners.
What Does Project Bag Mean?
A project bag refers to a specific type of bag used to store and carry materials needed for a project or task. It is designed with multiple compartments and pockets to keep items organized and easily accessible. Project bags are commonly used by artists, crafters, and professionals for efficient storage and transport of their tools and supplies.
How To Choose The Right Fabric For Project Bags?
When selecting fabric for project bags, consider durability, washability, and aesthetic appeal. Choose a sturdy material such as cotton or canvas that can withstand frequent use. Opt for fabrics with colorful or patterned designs to add a touch of personal style to your project bags.
What Are The Essential Features Of A Project Bag?
A good project bag should have ample storage space, multiple compartments or pockets for organizing supplies, a secure closure mechanism like a zipper or drawstring, and a comfortable handle or strap for easy transport. These features ensure that your project bag keeps your materials safe, organized, and convenient to carry.
Conclusion
Creating your own Project Bags can be a fun and rewarding endeavor. By following the steps outlined in this blog post, you can easily make personalized, functional bags to store and transport your projects. Whether you’re a seasoned crafter or just starting out, making your own project bags is a great way to add a personal touch to your creative process.
Start gathering your materials and get ready to embark on your project bag-making journey!

Welcome to Old Money Bag, your premier destination for the finest and most exquisite luxurious bags. Owned and curated by Blog: Leslie Palacio, our website is dedicated to bringing you a collection of handpicked, high-end bags that exude elegance and sophistication.